Our Admin Console is the centralized location in REACH used to manage all of your account data and information. In this article, we’ll walk you through the general navigation of the Admin Console and explain how to use and customize to your preferences.
Dashboard Numbers
The top part of the Dashboard includes any flagged notes for your organization. As shown below, you will see a red bar flagging the organization for past due sponsorship payments.
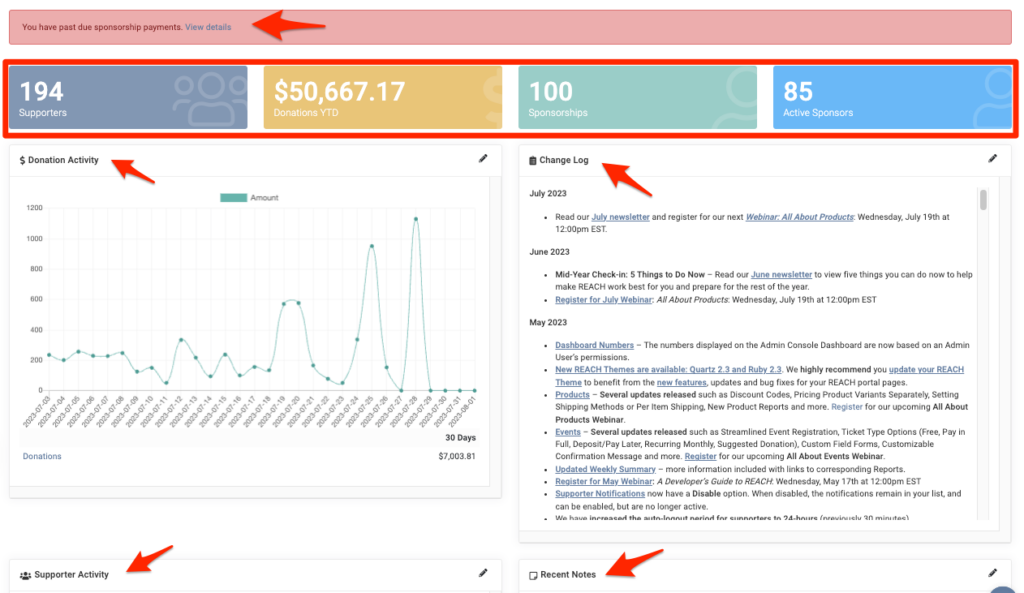
Dashboard Numbers are shown next. The visibility of these Dashboard numbers are based on the Admin Permissions of Supporters, Donations, Sponsorships and Sponsorship Supporters. Dashboard Numbers include:
- Supporters: Total number of all Supporter records in REACH
- Donations YTD: Amount of total completed Donations year to date
- Sponsorships: Total number of all Sponsorship records in REACH (Active, Left Program (Disabled) and Graduated)
- Active Sponsors: Total number of active sponsorship-supporter relationships
Located just below the Dashboard Numbers in your Admin Console, Dashboard Widgets provide visual insights into your key performance indicators (KPIs), metrics, and supporter engagement. Their goal is to help you quickly understand trends, assess performance, and make informed, strategic decisions that move your organization forward.
Refer to our Dashboard Widgets article to learn about the widgets included by default,how to add new widgets, and our recommended widgets along with their key parameters to configure for meaningful insights.
Admin Console Navigation
Left Navigation
Add a New Shortcut
For your personal Admin Console Dashboard, you can add shortcuts enabling you to quickly navigate to various pages within the Admin Console. Common examples are to the Donations or Sponsorships modules, to a specific Project or Campaign you are in charge of or to a specific Setting such as Admin Users.
To add a shortcut:
- First navigate to the screen you want to add a shortcut to
- Click on the REACH logo > +Add More
- Add a Title
- Add the URL if you are not already on the desired screen – this is the link to the module within the Admin Console. For example, the URL for the Post Program Support Project module would be: /admin/projects/post-program-support
- Click Create
REACH Modules
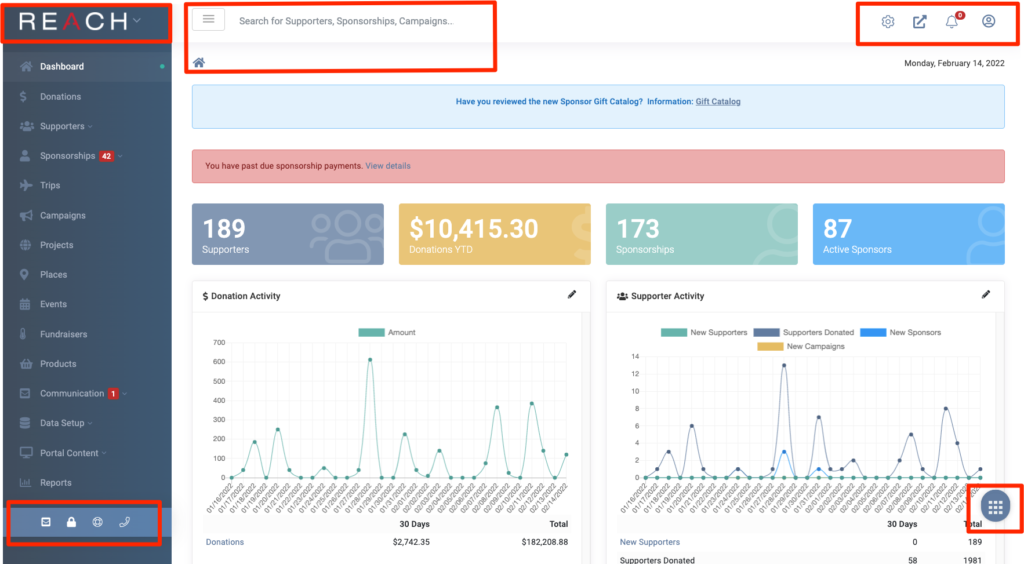
The left-hand column of the Admin Console lists all of the Modules that you will need for most of your everyday activities in REACH.
Clicking on Dashboard will take you back to the main dashboard shown upon sign-in. Clicking on a Module’s title will take you to that Module’s main page.
Modules include: Donations, Supporters (Supporters, Groups, Segments), Sponsorships (Sponsorships, Sponsorship Types, Conversations, Sponsorship Images), Trips, Campaigns, Projects, Places, Events, Products, Communication (Messages, Emails, Text Messages), Data Setup (Data Import/Export, Custom Forms, Custom Fields), Portal Content (Pages, Albums, Media), Reports.
Note: Modules listed may differ based on your plan level and your organization’s specific usage. For example, Campaigns is only listed if you are using Campaigns within REACH.
Underneath the Modules list, you will find buttons to Contact Support, Send a Secure Message/File(s), view the Knowledge Base, and Call Support.
Top Navigation
Search Bar
Using the Search Bar at the top of the screen, you can type in any specific name or detail to quickly find what you’re looking for within the primary modules of Supporter, Sponsorship, Project, Place, and Campaign.
Clicking on the three bars will hide the left-hand column, making the main page be shown as a full page.
Underneath the search bar you will see a Breadcrumb trail. This is intended to help ease navigation, orienting you to exactly where you are within the Admin Console at any time, and giving you quick links to return to previous sections or modules. This is an example of a breadcrumb trail:

In this example shown, clicking on Sponsorships will take you back to the main Sponsorships page from Ana’s record.
Fun fact: The term Breadcrumb originated from the Hansel and Gretel fairy tale in which the two children drop breadcrumbs to form a trail back to their home.
Right Navigation
Top Right Icons
The gear icon lists all of the available Settings you need to manage your REACH account, including: Account Settings, Retainer Service, Account Rules, Admin Users, Domain Names, Data Categories, Campaign Themes; Donation Settings for Donation Setup, Donation Categories, Donation Forms; REACH Portal Settings for Portal Setup, Portal Branding, Menus, Themes, CSS Editor, Site Integrations; Communications Settings for Text to Give, Email Templates, Mail Merge Templates.
The pop-out icon provides you with direct links to view your public REACH site.
The bell icon is where an Admin is notified of a Task that has been assigned to them. As shown above, the red number 1 indicates that the Admin that logged in has one Task awaiting them.
The Profile icon links to account information for the Admin User. This includes the Admin’s name and email address and provides the Admin the option to Change Password/Info, view Fullscreen, Enable/Disable Dark Mode or to Logout of the Admin Console.
Dark Mode
To enable or disable dark mode:
- On the top right of the Admin Console, click on the Profile icon
- Click on Enable Dark Mode to switch to dark mode
- Or, click on Disable Dark Mode to end dark mode
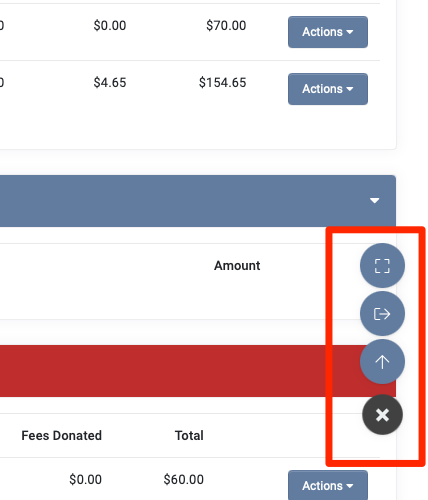
Bottom Right Icons
When an Admin clicks on the Grid at the bottom, they can Scroll Top to the top of the page, Logout of the Admin Console or View as a Full Screen.
At the very bottom of the Admin Console, you will see links to our parent company, Sugar Maple Interactive, LLC as well as an About us page, our Terms + Conditions and Documentation.
Now, let’s detail how to get and stay in touch with us in our Support Information article.
Let’s Get Social