Groups are a way for you to organize your supporters in REACH by various characteristics, activity, interests, involvement, etc. For example, if you have a number of supporters that belong to a specific church, you can create a Group with the church name and then add those supporters to the Church Group.
Tip: You can also add new sponsors to a group automatically. Under Account Rules, click the Sponsorships tab. Next to “Automatically add new sponsors to a group” select the group from the dropdown, then click Save Changes. This will give you an efficient and convenient way to view and communicate to new sponsors.
A Supporter can belong to more than one group, and the groups they are a part of display in the Groups box of their Supporter Profile.
Supporter Group examples are:
- Volunteer
- Mission Trip Interest
- Churches Visited
- School Name
- New Sponsors from ______ event
To create a Group:
- Go to the Supporters > Groups
- Enter a Group title, and add a description if desired
- Click the green Create button.
Adding Supporters to a Group:
From the Groups Module
- Go to Supporters > Groups
- Next to the Group you want to add to, click Actions > View Supporters
- Next to Add Supporter to Group, click New
- Click on the Existing button if the Supporter is already in your system and you wish to add them to the Group. To do so, simply type in their name and from the auto-filled search, choose the Supporter and click Add.
- Click on the New button to add a new Supporter.
- Type in their information and click Add.
- All Supporters included in the Group are listed at the bottom of the page
From a Supporter Record
- Click the Actions button and select Edit
- Click the Groups tab
- Click Attach to Group, select the Group, and Save Changes.
- Note: Multiple groups can be selected for a supporter.
From a Supporter Import
- First, create a Supporter Group to use for the import by going to Supporters > Groups and clicking + Add Group.
- Go to Data Setup > Data Import/Export
- From the Imports tab, click on System Import Templates and download the Supporter Import Template.
- In the Supporter Import Template, use the supporter_permalink column to add your supporter permalinks and the groups column to add the Supporter Group permalink. Save the import file in CSV format.
- Go back to Data Setup > Data Import/Export
- Next to Import Type, choose Supporters
- Upload your CSV Supporter Import Template.
Your Supporters will now be added to your Supporter Group.
Please note the index count for supporters in the Supporter is cached, so while the supporters will load into the Supporter Group immediately after import, it can take up to an hour for the index count to be reflected accordingly.
From Reports
- Generate a Report
- Check the box(es) or click All to select the Supporters you wish to add to the Group
- Click + Add Supporters to Group
- Select your Group from the dropdown menu
- Note: This includes all Groups created from Supporters > Groups
- Or, click + New Group to create a new group
- Click Add Supporters
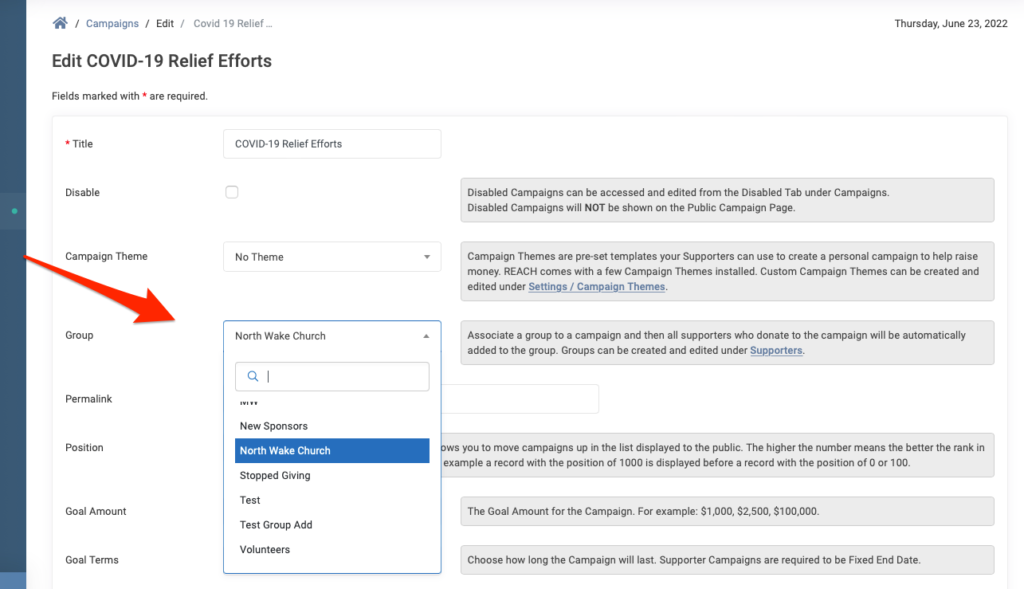
From a Campaign
- First make sure your Group has been created
- Then, when Creating or Editing a Campaign, select it from the Group dropdown select
- Anyone who donates to the campaign will be added to the Group selected
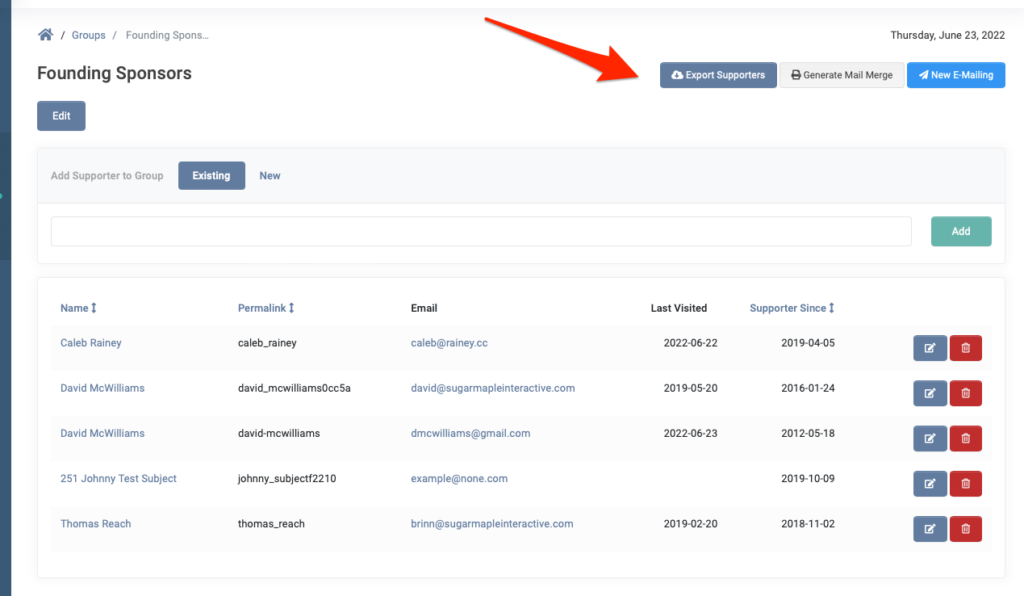
Once groups are created and supporters are added, you can click on Actions or the Group name to View Supporters, Edit, Export, create a New Email to the Supporters in the Group or Delete the group.
Let’s Get Social