This article explains the available contact methods for your supporter—phone numbers, email addresses, and physical addresses—displayed on the Contact Methods tab of their profile, along with key points to remember for each.

Phone Numbers
Primary vs. Additional Phone Numbers
- Add or edit phone numbers under Contact Methods > + Add a Number.
- Mark one as the Primary Phone Number.
Adding a Phone Number
- Enter the Phone Number (and Extension, if needed).
- Choose a Type: Home, Work, Mobile, Fax, Other, or Previous.
- Check Primary Phone Number if applicable.
- (Optional) Add Notes (visible to admins only)
Key Points to Remember
- You can add multiple phone numbers to a supporter’s profile.
- If a mobile number is added and Text Communication is enabled, you can send a text from Actions > Text.
- Learn more about Text Messages in REACH
- If the Text option isn’t available, the number isn’t recognized as text-capable by our service.
- If multiple mobile numbers are listed, texts will send to all of them.
- For issues with texting, see Not Receiving Text Messages for troubleshooting.
Emails
Primary vs. Additional Emails
- Primary email → Add or edit on the Create/Edit Supporter screen.
- Additional emails → Add under Contact Methods > + Add an Email.
Adding an Email
- Enter the email address.
- Choose a Type (Personal, Work, Other, or Previous)
- Check Include in Emailings if it should receive communications. (admin-only)
- (Optional) Add notes (admin-only)
Key Points to Remember
- To update the Primary email—edit the Supporter record by clicking Actions > Edit.

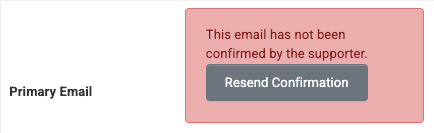
- If you see the message “This email has not been confirmed by the supporter”, it means the supporter’s profile was created through one of your custom forms. This safeguard helps prevent spammers from receiving your emails.
- If this is a legitimate supporter: Click Resend Confirmation to prompt them to verify their email. Once confirmed, they’ll be included in any supporter emails you send.
- If this appears to be spam: Click Actions > Delete to remove the supporter record.
- Emails marked Include in Emailings will get all REACH communications.
- Unsubscribe affects all listed emails in the supporter account.
- To stop sending to a specific email, admins can uncheck Include in Emailings or supporters can delete the specific address from their Donor Portal.
- Contact Preference = No → No emails sent to any address.
- Contact Preference = Yes → Emails go to the primary + any additional emails marked Include in Emailings.
- In Reports, non-primary emails can be included by using Select Columns to Display > Other Emails
- We recommend running a Blocked Emails report on occasion, to ensure your supporters are receiving emails and notifications.
Addresses
Primary vs. Additional Addresses
- Add or edit addresses under Contact Methods > + Add an Address.
- Mark one as the Primary Address.
Adding an Address
- Enter the Address
- Tip: For international addresses(e.g., Canada), select the country from the Country dropdown first to populate the correct Provinces/Territories.
- Choose an Address Type: Mailing, Billing, Other, or Previous.
- Check Primary Address if applicable.
- (Optional) Add Notes (visible to admins only).
Key Points to Remember
- Only the Primary Address is used in Mail Merge templates and generated in Reports
- The Billing Address in Contact Methods does not affect or get used for the payment method address.
- The address shown on a supporter’s donation receipt is the billing address associated with the payment method used. To update it, you can re-enter the payment method with the new address, or the supporter can log in to their Donor Portal and update the payment method there.
Let’s Get Social