REACH provides organizations with the ability to create unlimited Custom Forms to capture any desired data or information from your Supporters on your REACH website.
Note: To create a custom form to accept donations, please see our Donation Forms and Links article.
Common examples of Custom Forms are Event Registration, additional contact information, sign up forms for your newsletter, etc.
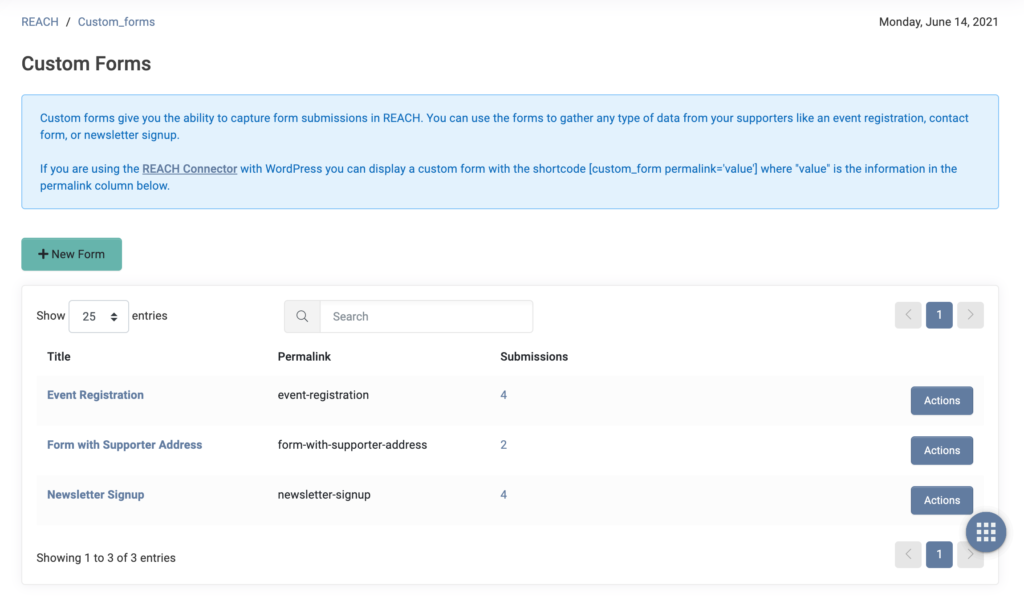
The Custom Forms main page will list the Title of the form, it’s Permalink and the number of Submissions. Available Actions are Edit, Share, New Email and Delete.
Creating a Custom Form
- Go to Data Setup > Custom Forms
- Add a Title and Description
- Select a MailChimp List, if applicable
- Review your Confirmation Options (what happens after a Supporters successfully submits the Custom Form)
- Add an Email to be copied on the Confirmation Reply
- Choose to Redirect to another website (a Redirect URL field will be shown if so)
- Choose to Display a Message (type in Message in new field shown)
- Click Create Form
The Form Fields tab allows you to add the various data fields to capture in your form. Mailing address information can be collected via custom form, and will create a new address for the supporter if present.
- Check the Find or Create Supporter box for REACH to automatically try to associate the form submission to a Supporter or Create a new Supporter
- Note: When this box is checked, submitting the form will create a new supporter record for any new supporter. An email will automatically be sent to the supporter to verify their email address. Once verified, the supporter’s email will be added to their profile. Administrators can also resend the email verification manually by clicking a button in the supporter’s record, if necessary.
- Select a Group to automatically add the Supporter submitting the form to a Supporter Group you have created.
- Click on Add Fields to add the fields you want to capture
- To collect Address information in the supporter record, you must use the Address Text, City Text, State Select and Country Select fields..
- Add a Title, Select the Data Type and check the box if the Field is Required
- Reorder Fields by Drag and Drop
- Click Create Form
The CSS Styling tab allows you to add custom CSS to have more control over the appearance of the form. Add your custom CSS and be sure to click Create Form when complete.
Share your Custom Forms
Once created, you will see your Custom Forms listed under Data Setup > Custom Forms.
From here, you can click on the Actions button to Edit, Share, create a New Mailing or Delete.
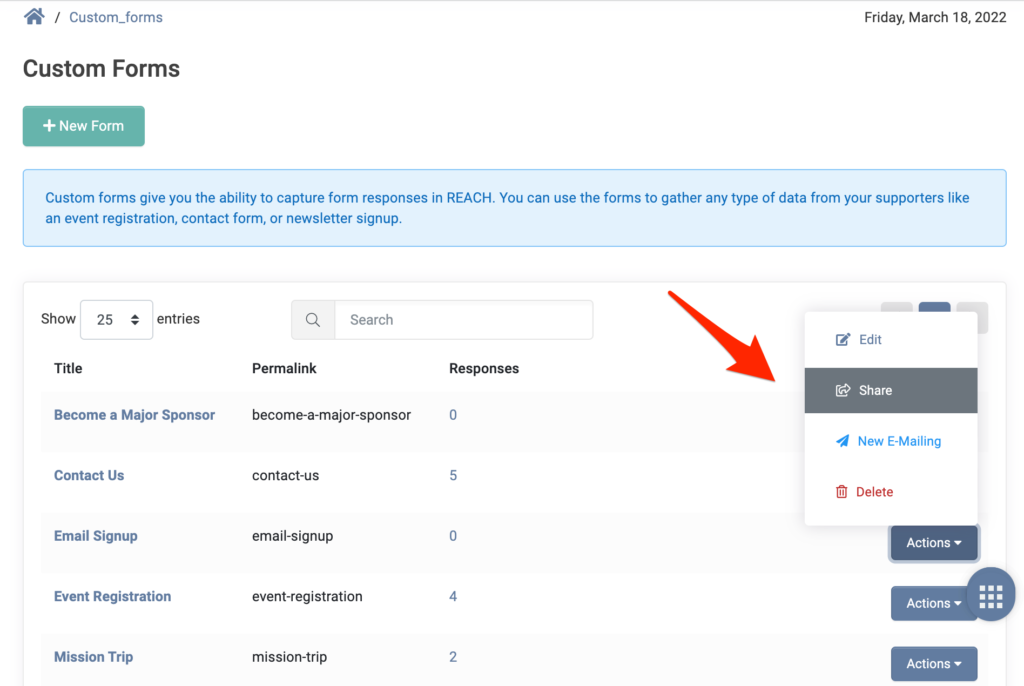
Let’s use a simple Email Signup custom form as an example. Click on Actions > Share next to the Custom Form.
As shown below, you’ll be provided with a Link that you can share with your supporters to fill out the form and code to Embed the Custom Form on any pages you desire.
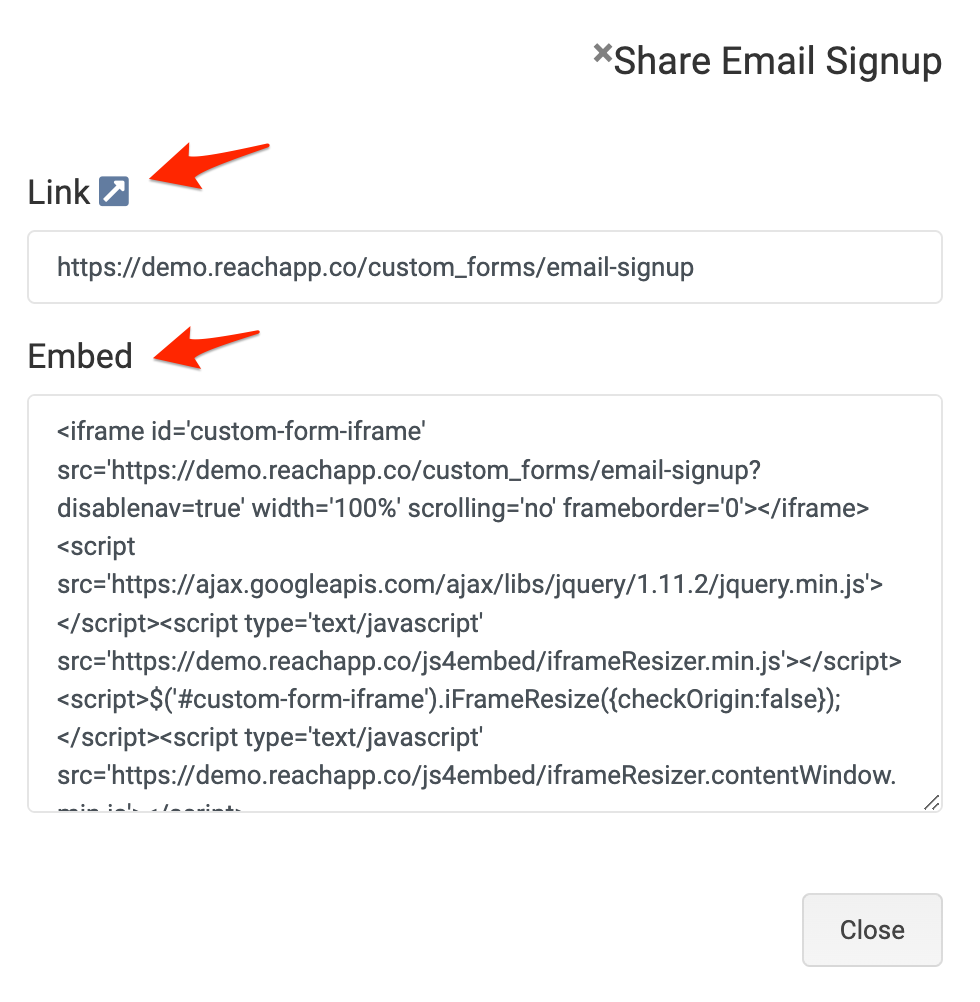
Note: The embed code will work if using WordPress. However, our REACH pages don’t currently support JavaScript embeds.
To embed the code on a REACH page, you can edit the Pages template of your Active Theme and add the embed code with a conditional based on the permalink of the page you want to add the custom form to.
To do so:
- Go to Settings > Themes
- Next to your Active Theme, click Actions > Edit
- Under the Templates area, next to Page, click Edit
- Add this code:
{% if page.permalink == “page permalink” %}
embed code here
{% endif %}
Whereas page permalink is the page’s permalink. For example, go to Portal Content > Pages. Click Actions > Edit next to the Page.
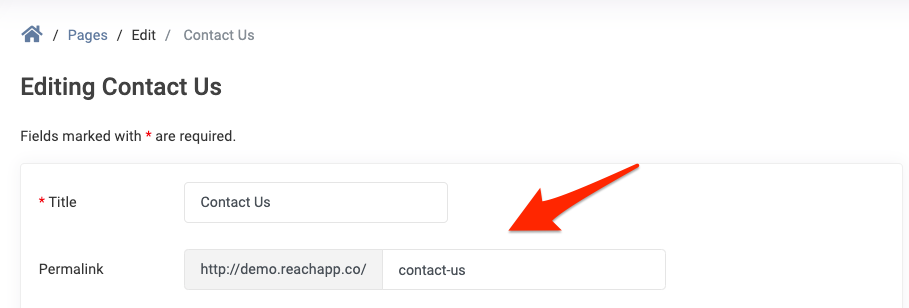
In this example, the permalink is contact-us, so you would add “contact-us”.
And embed code is the Embed code provided when creating your custom form.
If you need any further assistance, please contact our Support team.
Let’s Get Social