As an admin, you can manually add a donation or sponsorship payment on behalf of a supporter.
Note: A transaction fee is NOT charged for check or other offline donations manually entered into REACH.
One-time Donation for a Sponsorship
Note: In order to enter a donation payment for a sponsorship, you must first make sure the sponsorship supporter has been set up. If you are setting up a recurring donation for a sponsorship, please see Starting a Sponsorship for a Supporter, or refer to how to convert an existing sponsorship from Offline to Online recurring.
To add a one-time donation for a sponsorship:
- From the Supporters module select the Supporter’s name
- Under Current Sponsorships, click on the name of the Sponsorship you want to add the donation to
- This will take you to the Sponsorship Supporter record
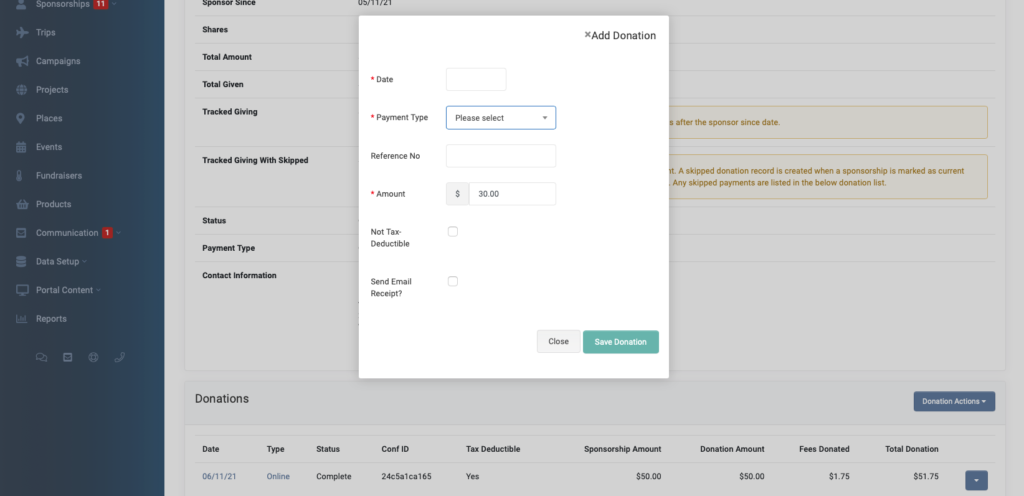
- From the Donations section under the sponsorship details, click Donations Actions > Add Donation
- Enter Date – when entering dates we suggest you use the Date Picker.
- Note: If you want to type in a date you MUST enter in the form of YYYY-MM-DD
- Enter Payment Type and Amount, and select whether to send an email receipt
- Then click Save Donation
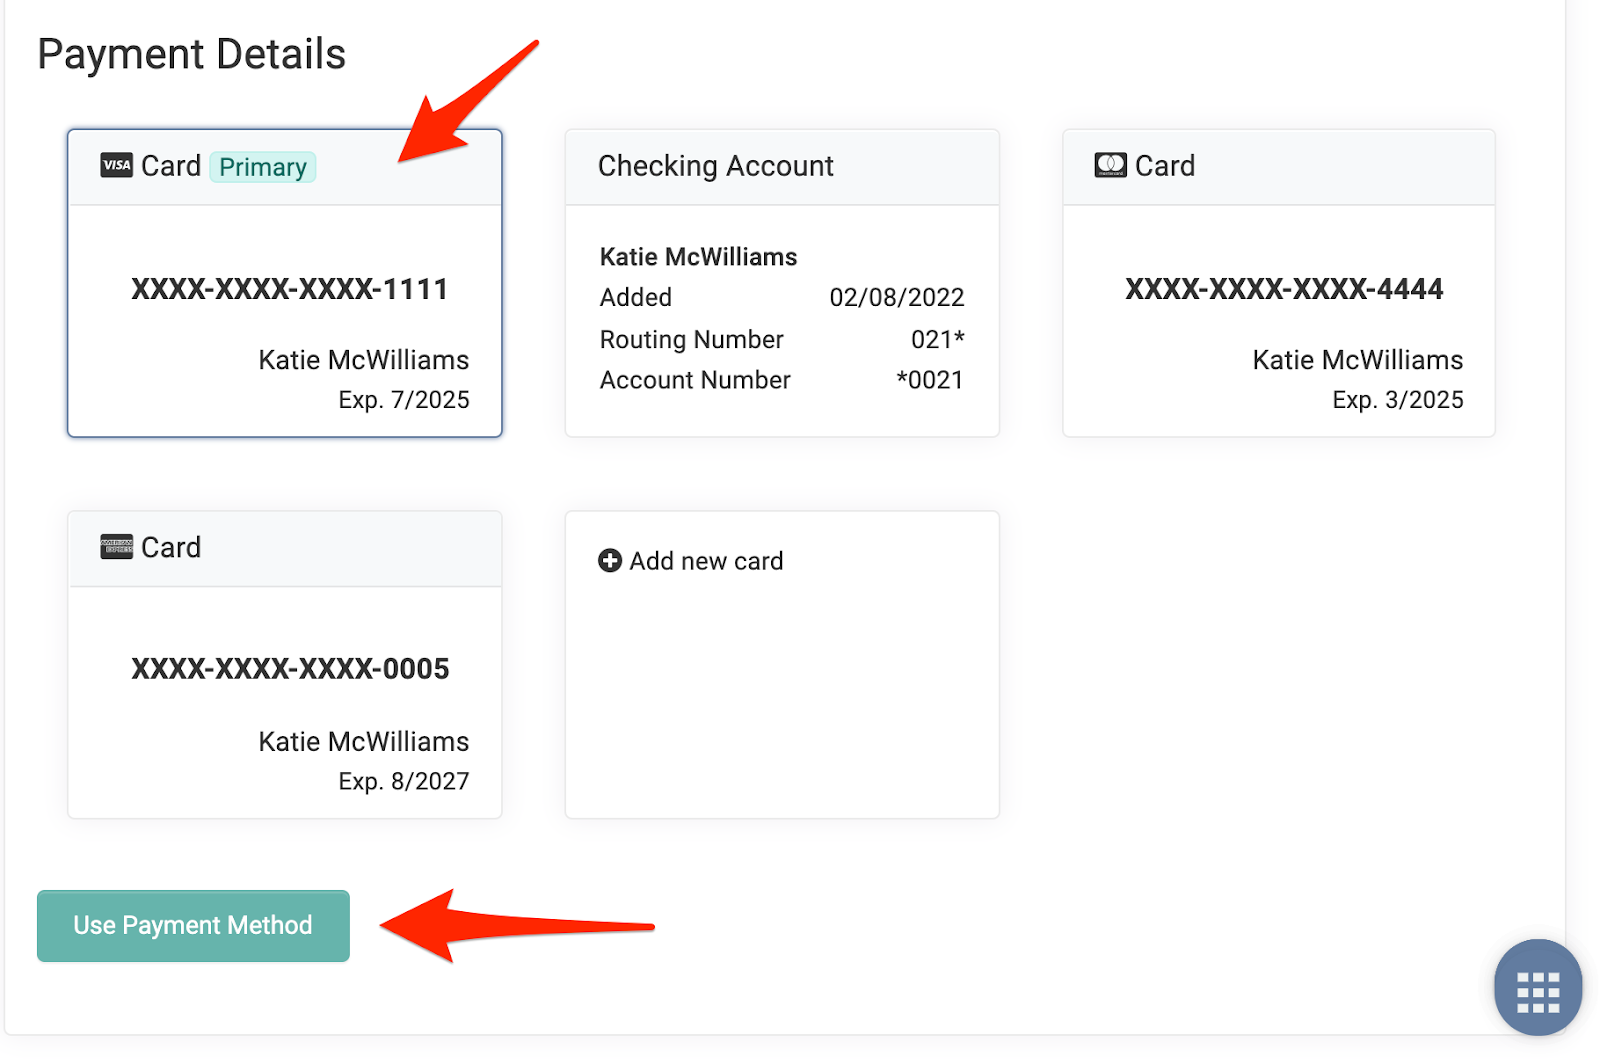
- If it is a credit card donation, you will then be asked to either use the primary payment method or select the payment method to be used before the donation is processed.
- If a supporter has multiple payment methods on file, you can choose which payment method to use by scrolling down to the Payment Details section and clicking on the desired payment method box.
- Next, click Use Payment Method to complete the donation.
Note: One-time donations to a sponsorship can also be added from the supporter record by clicking Actions > +Donation > Add Purpose > Enter Amount > Select Sponsorship > Select Sponsorship Name and then filling out the remaining information.
Donations for any other Purpose
- If from the Supporter record, click Actions > +Donation button
- If from the Donations Module click +New Donation
- Add the Supporter by typing in the supporter’s name to auto-fill or by clicking on the +New Supporter button
- Choose a Donation Date with the date picker, or by typing in as YYYY-MM-DD
- Add an Amount and select the Purpose
- Click Add Purpose again to designate the donation to multiple purposes (half to a general fund, half to a project for example)
- Select Payment Type
- If processing card or ACH/EFT through REACH, select Online Card/ACH/EFT
- Otherwise select the other appropriate Offline payment type
- If this is meant to be a recurring donation, check “Make a Recurring Donation” and then select the Recurring Period
- Add a Reference Number for a check number or other reference
- Check Send Email Receipt if there is a Primary Email listed for the donor.
- Check any other options needed (Not tax-deductible, keep donor anonymous, keep amount anonymous, donate in honor or memory of a loved one)
- Note is visible only to the donor; Admin Note is visible only to admins
- Add a Soft Credit if the donation is being made on behalf of another supporter. In the Soft Credit field, start typing the name to auto-fill that existing supporter.
- Click Create or Save
You will then be asked to Confirm Your Donation and will need to use the account on file or select from the payment methods listed should the supporter have multiple payment methods on file.
To do so, scroll down to Payment Details and click on the desired payment method to highlight the box and then click on Use Payment Method. This will complete the donation.
Batch Donations for a Single Supporter
If a check is intended to be split among various purposes, if there are multiple checks from a single supporter, or If you want separate donation records from one offline donation, you can use the Batch Donation option.
The example below shows multiple checks from a single supporter. For more about checks split among various purposes, see Entering a Split Donation.
- Go to Donations > +New Donation
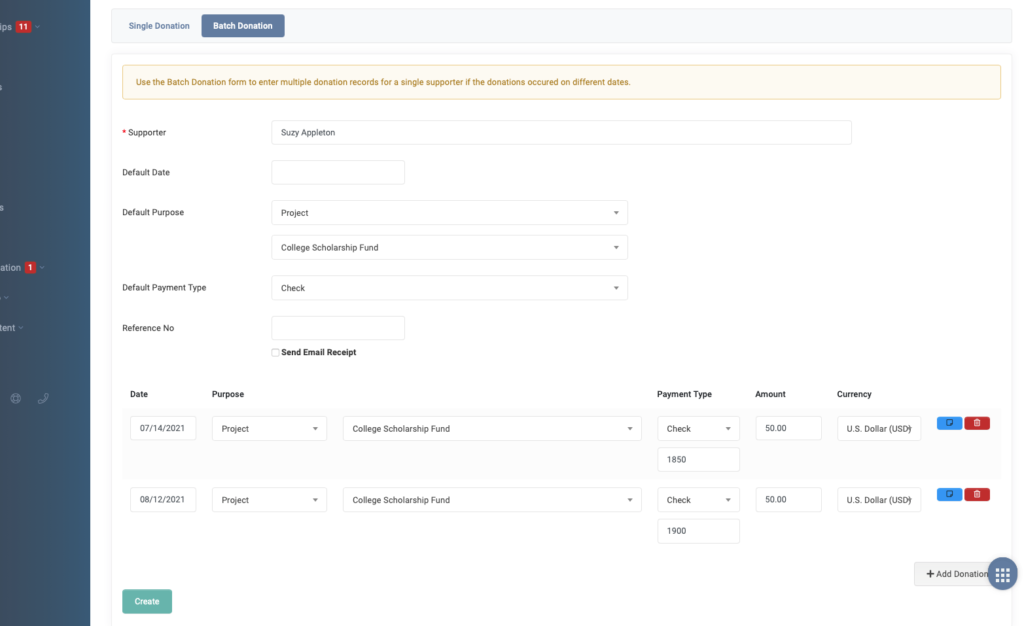
- Choose the Batch Donation tab
- Add the Supporter by typing in the supporter’s name to auto-fill or by clicking on the +New Supporter button
- Enter Default Date, Default Purpose and Default Payment Type if desired – These will be the default entries for each added donation, but can be changed with each donation added.
- Click on the blue Notes button to add a note visible to the donor or a note for admins only
- If a supporter has multiple donations or the donation is intended to be split among various purposes, click on the + Add Donation button as many times as needed and enter in each donation separately
- When entering the date, use the date picker or type in as YYYY-MM-DD
- Click on the ‘Send Email Receipt’ check box to have an email receipt sent to your supporter.
- When complete, be sure to click on the green ‘Create’ button
The batch donation receipt can be edited by going to Settings > Email templates and selecting New Batch Donation. This template is intended as an email receipt that will go out to the supporter after a batch donation entry has been completed from their donations.
Let’s Get Social