REACH integrates directly with Managed Missions to help you manage your Trips.
Use REACH as your system of record – keeping your donor and trip data organized within REACH. The data that is synced from your Managed Missions account can be used in your Contribution Statements and Donation History.
To begin, you will need to sign up for a Managed Missions account. Once signed up, contact our Support team and provide us with your API Key from Managed Missions. Once that process is done, you will see Trips listed as a module on the left-hand side of the Admin Console.
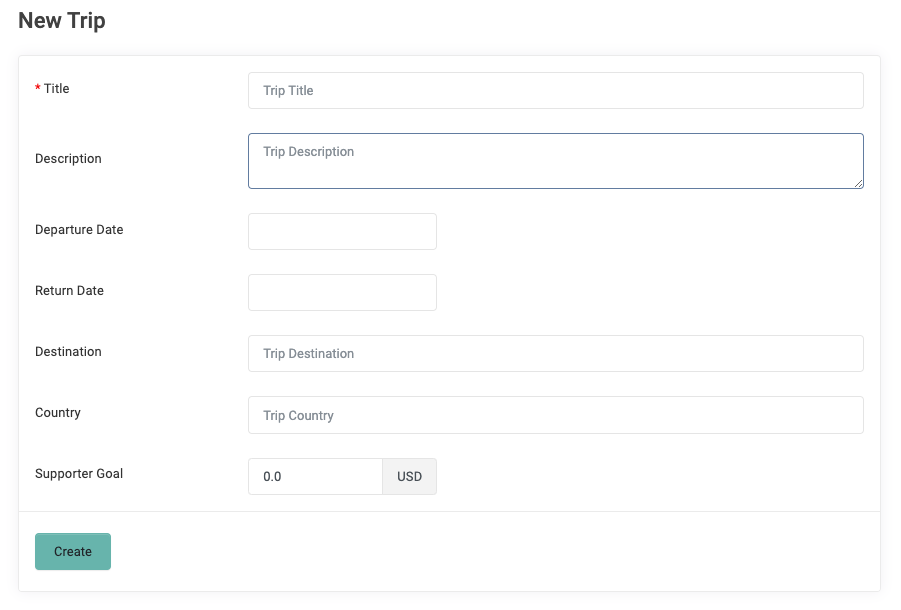
To add a Trip within REACH:
- Go to Trips
- Click + New Trip
- Add a Title (only requirement) and Description
- Include a Departure and Return Date
- Note your Destination and Country
- Add a Supporter Goal
- Click Create

Your Trip will then be listed on the main Trips page and is available to start syncing with Managed Missions.
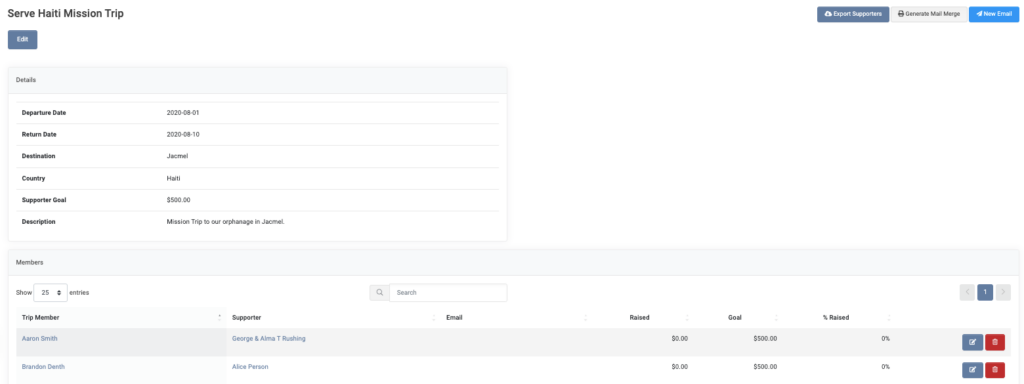
Once synced, here is an example of how the data will appear in REACH.
In the information box, you will see the:
- Departure and Return Date
- Destination
- Country
- Supporter Goal
- Description
In the table:
- Trip Member
- Supporter
- Raised Amount
- Goal Amount
- % Raised
- Edit, Delete options
You can also:
- Export Supporters
- Generate a Mail Merge
- Send an Email to the Supporters


Let’s Get Social