REACH allows organizations to add any number of Projects to detail their various initiatives, associate them to their Places, Campaigns and Sponsorships and post updates to allow their Supporters to stay informed on its progress.
Note: You can update the Hero Image (Cover Image) on your main Projects page in the Settings > Portal Setup > Projects tab.
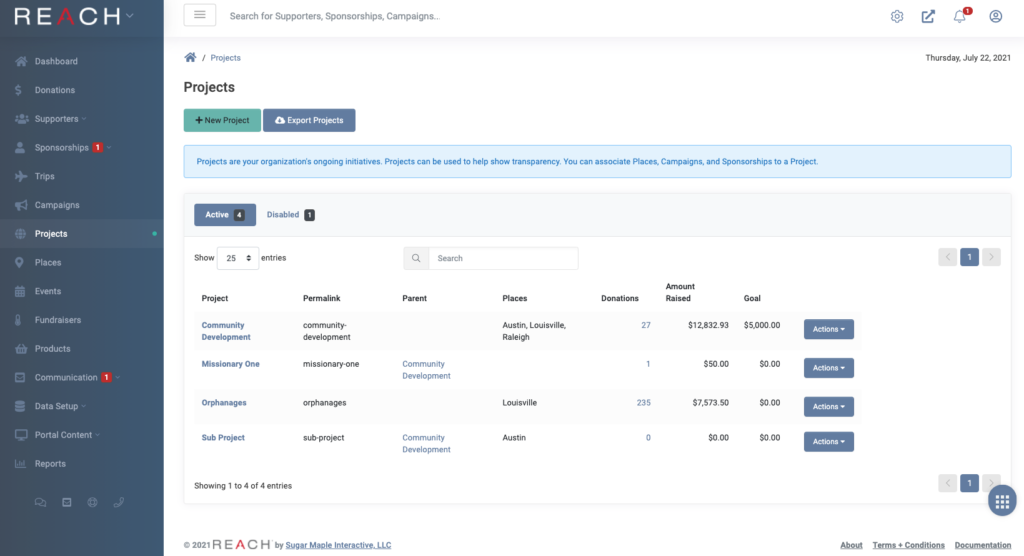
The main Projects page will list the name of the Project, the Permalink, the Parent, any associated Place, the number of Donations, the total Amount Raised, and the Goal.
The Actions button will allow you to Edit, Copy, Crop Images, add a New Sub-Project, create a New Message or New Email to the Project’s supporters, Generate a QR Code, or Disable the Project.
You can also tag your projects (ex: assign them to an admin or give them an admin-only view priority status).

To add a Project:
Note: Title is the only information required.
- Go to Projects, click +New Project
- Add a Title and Subtitle, if applicable.
- Choose whether to Disable Project. Disabled Projects will not be shown on the public Projects page.
- Set a Goal Amount (optional)
- Add an Image (we recommend a square image of 900 x 900 pixels)
- Add a Cover Image (we recommend at least 1000 pixels wide x 300 pixels tall)
- Add a Leader Name, phone number and email for the Project.
- Add a Web Address. This is used if you have an additional webpage set up for your Project outside of REACH.
- Add a GL Code if applicable
- Add a Mailchimp tag if applicable
- Insert Project Custom Fields if desired, examples could be Estimated Completion Date or Project Additional Information. View our Projects Custom Fields article to learn more.
- Add Donation Levels (optional) to provide your supporters donation benchmarks as pre-determined donation amounts (ex: $50, $100, $250) as a one-time or recurring donation.
- Attach to a Place or multiple Places (if the Project is being worked on in multiple locations)
- Add a Description to describe the Project
- Click Create Project
To add a sub fund, go to the main Projects page, find the main Project title and then click Actions > +Sub-Fund. Repeat the process above to create the Sub Fund as a New Project.
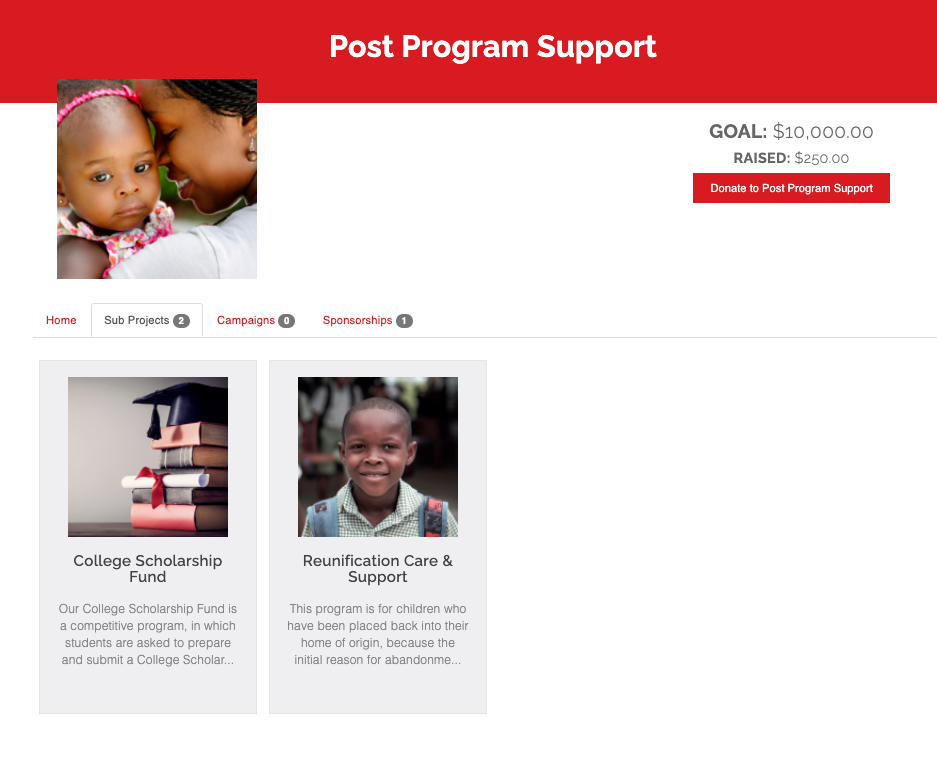
This is an example of how a Sub-Fund (Sub Project) looks on a Project Page:


Let’s Get Social