MailChimp is a great tool for email marketing. Our integration with MailChimp allows you sync your supporter contact information into MailChimp so you can send your emails, track results and connect with your donors.
If you do not already have a Mailchimp account, you can sign up at Mailchimp.com. Once you have an account, you can then enter your account’s API Key into REACH. REACH allows you to add multiple Mailchimp accounts into REACH.
You will be able to select the default audience (list) to store all supporter email addresses. By integrating Mailchimp with REACH, your contacts are automatically updated in Mailchimp, and you can also add tags to Mailchimp contacts based on their supporter activity in REACH.
Notes:
- Information is synced nightly. New supporters will not be available in Mailchimp until the next day.
- REACH syncs with Mailchimp API v3. If you are using a previous version, we recommend you re-generate an API and add it to your REACH account. Follow the same instructions below, instead click Generate Key.
Creating an API Key in your Mailchimp Account
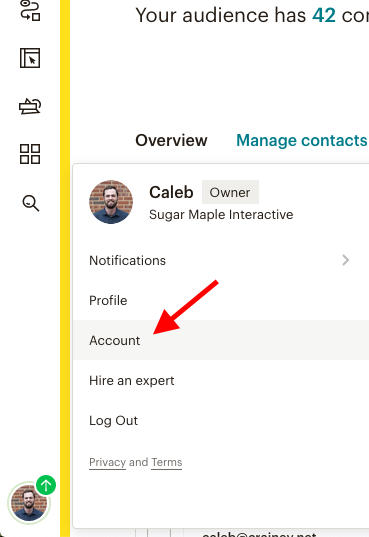
1. Go to your account settings in Mailchimp

2. On the settings page, open the Extras menu and select API keys
3. On the API keys page, click Create A Key
Adding your Mailchimp API Key to REACH
1. From your REACH Admin Dashboard, go to Settings > REACH Portal > Site Integrations
2. On this page, click the + Add New Mailchimp Account, enter a Title for your Mailchimp account, enter your Mailchimp API Key, click Validate, and then choose your Mailchimp Default List (Audience), click Save Changes.

Note: When copying the key(s) from Mailchimp, be sure to copy the entire key. The key(s) will end with a dash and suffix like “-us8”.
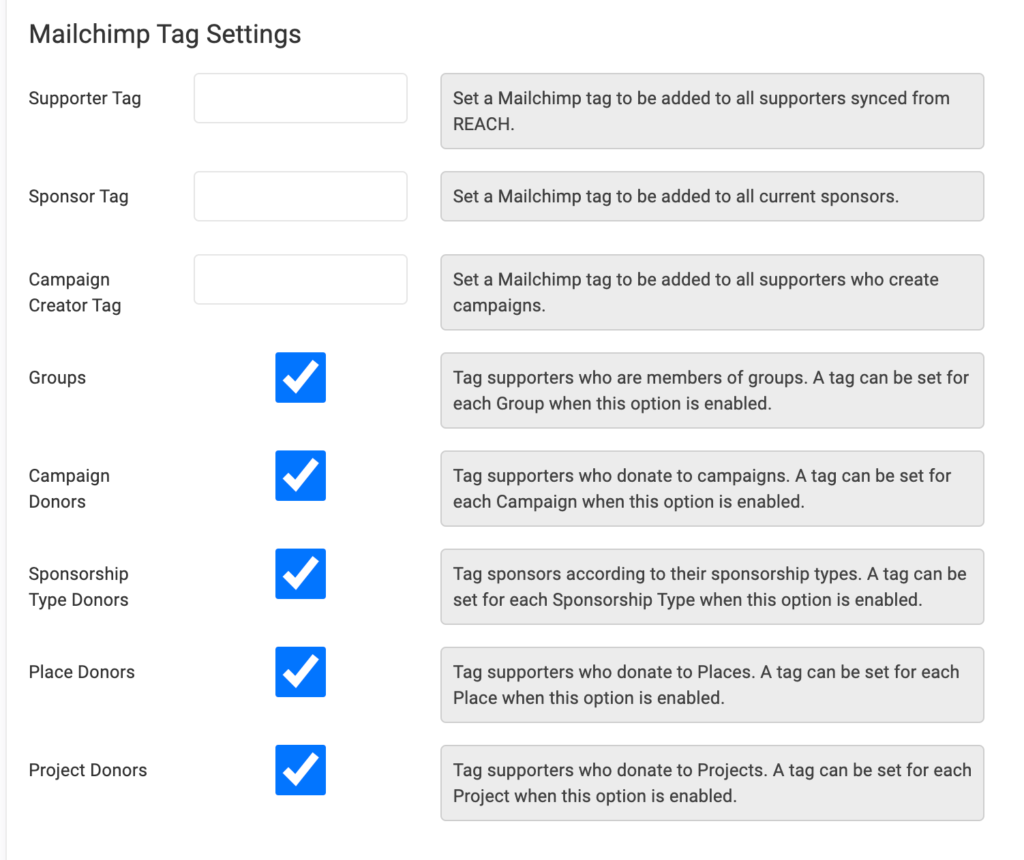
3. Select which Mailchimp Tag Settings should automatically be added

Tags for Groups, Campaigns, Sponsorship Types, Places, and Projects will default to the title of those items, but can be customized by editing the item after enabling its Mailchimp tag.
Once completed, be sure to click on Save Changes.
If you need to sync supporter information such as name, address, and phone number, see MailChimp Sync Options.


Let’s Get Social