REACH allows you to customize your Menus to list any number of your site’s pages that can easily be added, reordered or removed at any time.
Multiple menus can be added. For example, you can have your Main Menu and also add a Footer Menu. Menus can be placed anywhere on your site, except in your Donor Profile area.
Customizing Your Menu
- Go to Settings > Menus
- To add an additional Menu other than Main Menu, add a Title and click on Create Menu
- To review and edit your Main Menu, click Edit
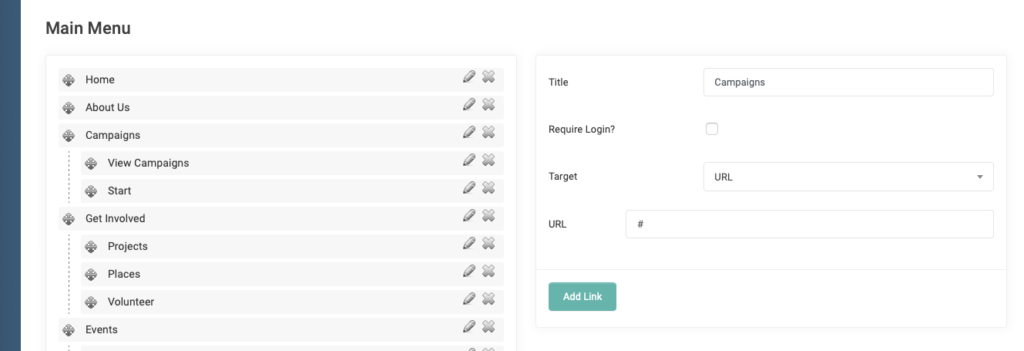
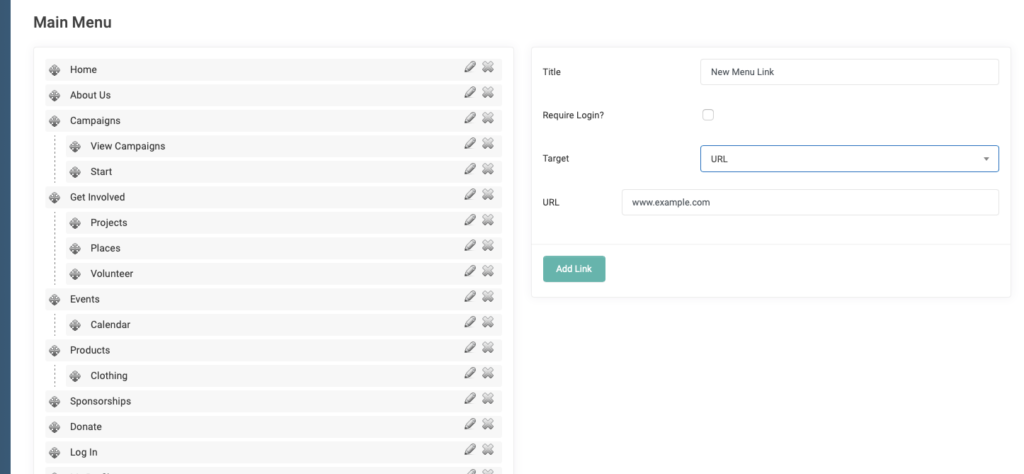
- Your default Menu tree will be listed on the left.
- To add a menu item, give it a Title
- Choose whether to Require a Login by checking the box
- Note: We provide this option for security and privacy reasons, should you have any part of your site you desire to be kept confidential and not shown publicly.
- Choose a Target from the dropdown
- Note: The Target is a page or custom URL link for the menu item.
- Click Add Link
The menu item will then be added to the bottom of the Menu tree on the left. You can drag and drop on the various menu items listed to reorder them by moving them up and down. Changes are updated automatically.
Note: REACH is set up to include parent and sub menus only.
To remove a menu item, simple click the red delete button next to the item you want to remove. This will not delete any data, but will simply make the page inaccessible from the menu.
If you have deleted a main menu item, like Sponsorships, and would like to replace it, you will select Sponsorships from the Target dropdown and click Add Link.

If you have deleted a parent menu item, like Campaigns that has View Campaigns and Start a Campaign – as their child menu items, and would like to replace it, you will need to select Target > URL and then in the URL field, add # and then click Add Link. If desired, you can then add the child menu items from the Target list and click Add Link.

Integrating the Portal with Your Website
If you already have a website and would like to integrate your REACH portal in a way that will be unnoticeable to your visitors–for example, someone visits the Sponsorship page, and you want them to easily get back to your website without knowing they have “left”–you will do that through the Menu.
First, be sure you have customized your REACH portal through Portal Branding and Portal Setup to have a similar look and feel to your website.
- Go to Settings > Menus > Main Menu
- Option 1, you can choose to remove menu items you do not want shown by clicking the red delete button.
- For example, if you are not using Projects, Places and Campaigns, you would remove those items. They can be added again at any time if needed using the Target dropdown on the right.
- Supporters will now only see Home, Sponsorships, Login and Profile when they are in Sponsorships
- Now, redirect the Home menu item to your website Home page. To do this, click the pencil icon. In the box next to URL, place the entire address of your website: Click Save Changes.
- Option 2, you can choose to show all your own website menu items viewable and linked from a REACH portal page,
- To the right of the Menu list, add your menu title and URL for each page.
- Save changes.
- Drag and drop to reorder menu items to display the same as your website.


Let’s Get Social