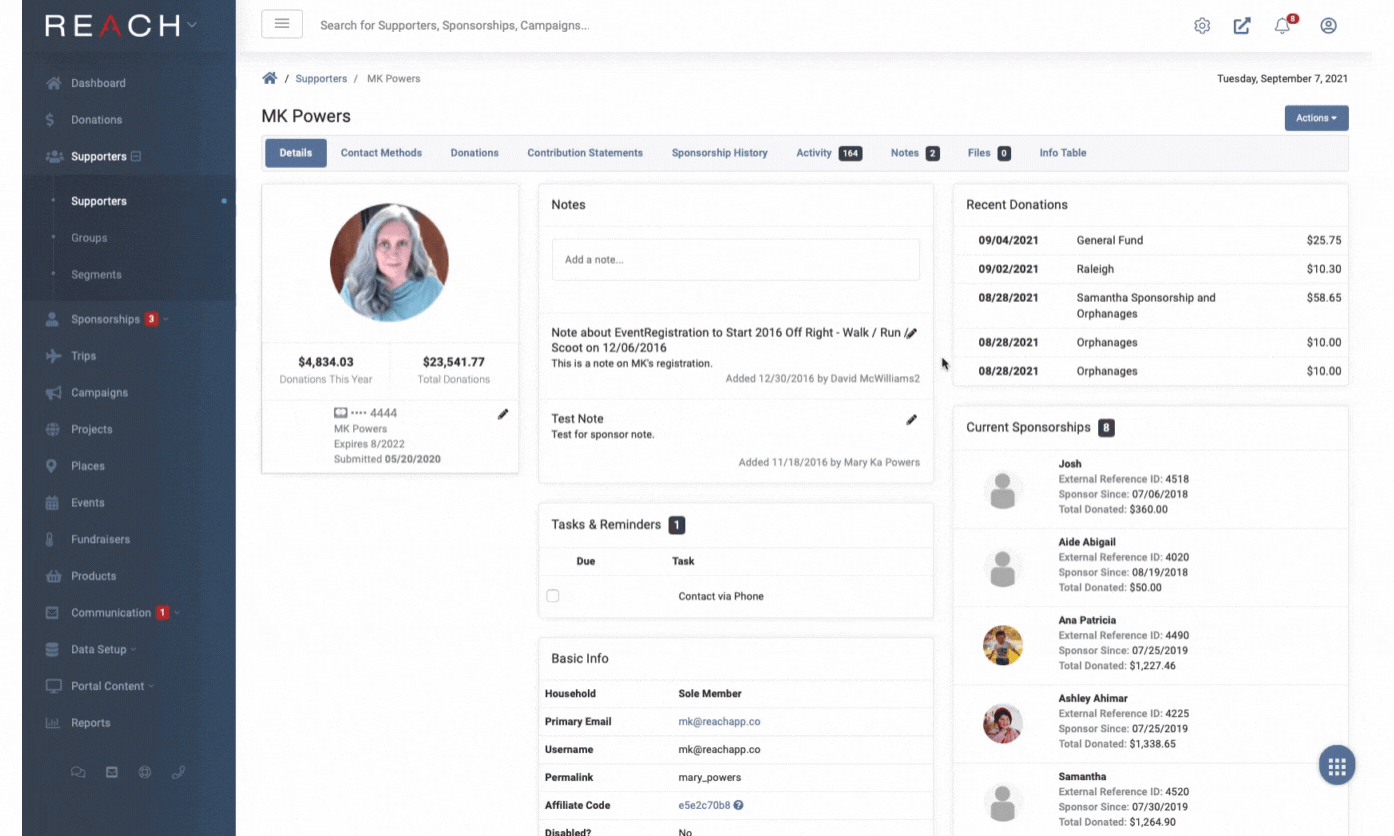
The Supporter Profile in REACH allows you to see detailed information about your supporter and their activity with your organization, as well as manage their sponsorships, information and donations and communicate directly with them via email or text message.
A supporter record can be added by an admin, and does not require the supporter to also be a donor or sponsor. An individual or organization may have a supporter record because of other types of support or engagement within your organization.
A supporter record is automatically created when an individual donates, sponsors, registers for an event, purchases a product or creates a campaign from your REACH portal for the first time.
However, if a current supporter first logs in, or they use their Primary Email when completing any of the above activities, the information will be added to their existing record.
Individual Supporter Profile Overview
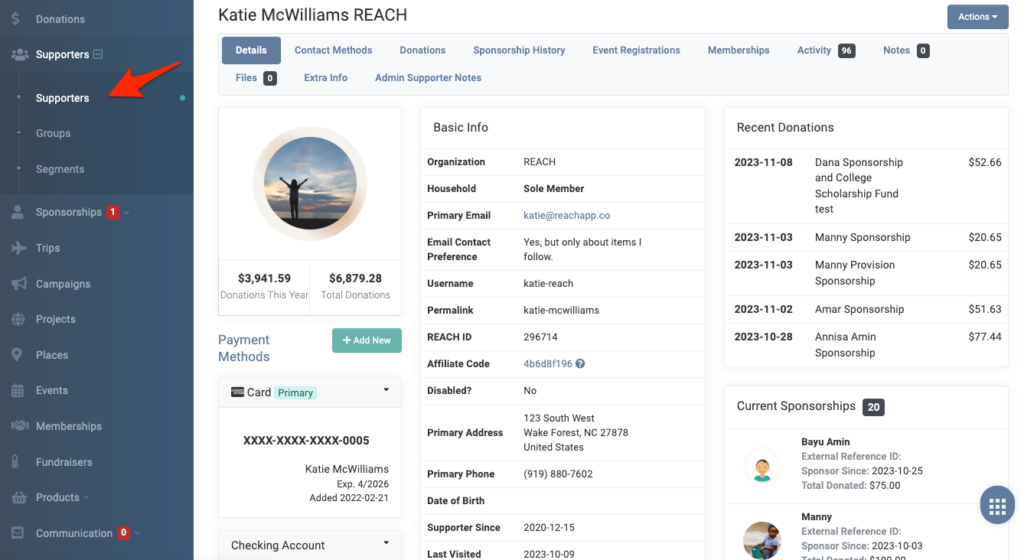
The Details tab includes a snapshot of the supporter’s information such as:
- Payment Methods
- Notes
- Tasks and Reminders
- Basic Info including contact information and Supporter Tags
- Email Contact Preference
- Note: The preference is set to Yes by default. This means that any updates to sponsorships, projects, places or campaigns that the supporter gives to will be sent to them. If a supporter does not want to receive emails you send using REACH from your organization, or any updates posted to Sponsorships, Projects, Places, Campaigns they support, they can opt-out by updating the preference in their donor portal, or you can set it to No in their supporter record. If the preference is set to No, the supporter will still receive transaction notifications from REACH.
- Recent Donations
- Current Sponsorships
- Other personal info based on your organization’s preferences and settings
- Groups
- Segments
- Supporter Created Campaigns
- Projects
- Places
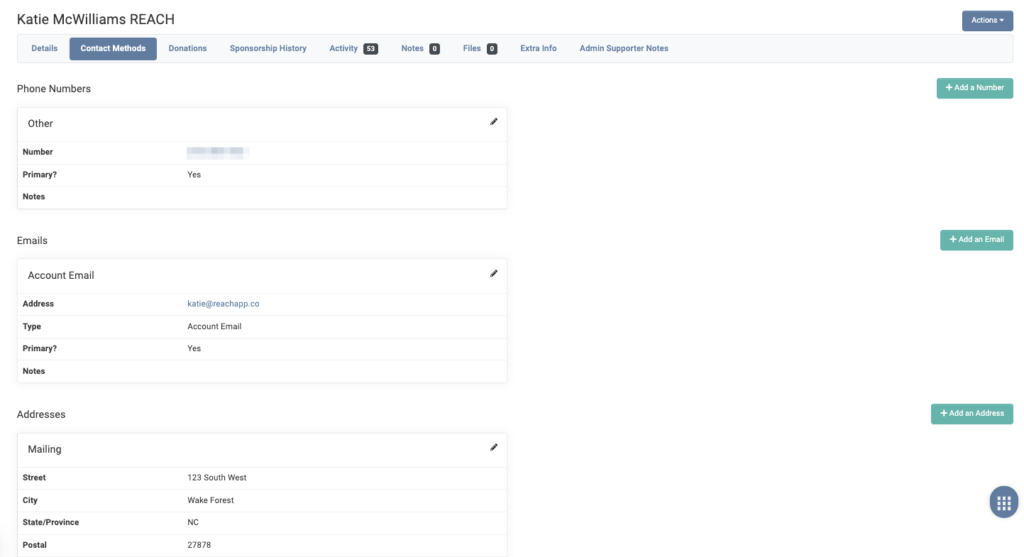
The Contact Methods tab is used to add and edit a supporter’s contact information including their:
- Phone Numbers
- Emails
- Addresses
From here, you can mark a contact method as primary.
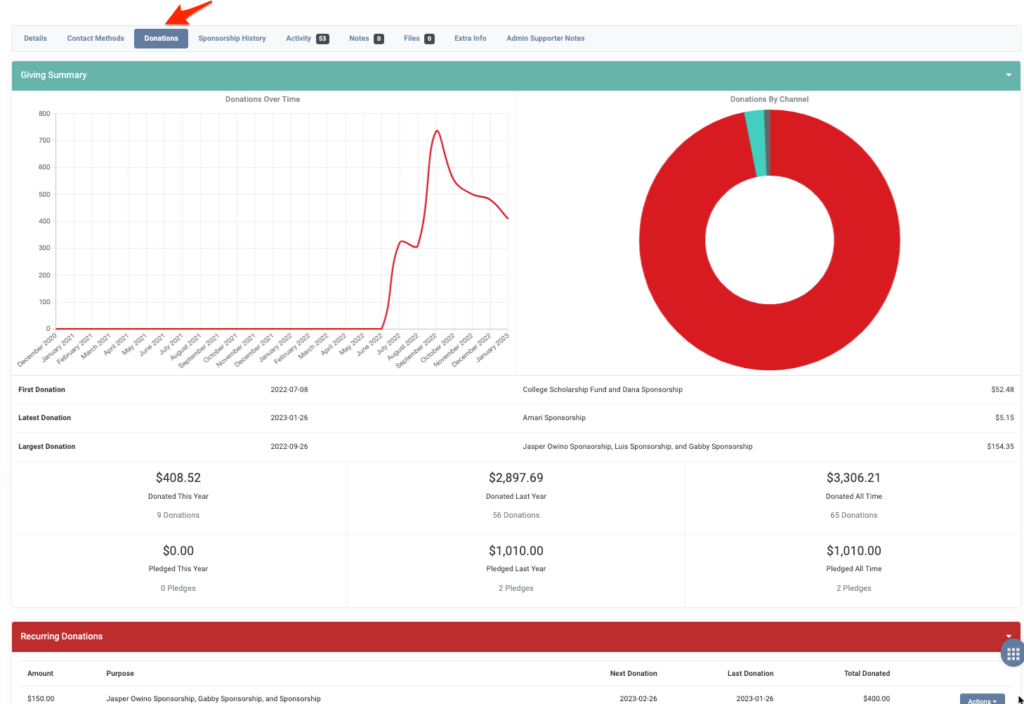
The Donations tab includes the:
- Supporter’s Detailed Giving Summary with charts and graphs
- Recurring Donations
- Pledges
- Donation History
- Soft Credit History
- Non Complete Donation History (Error or Incomplete Donations)
An admin can also create a donation for the supporter from the supporter record by clicking on the green + Donation button. If they have requested for you to set up an online payment, you can also create the donation for them using they payment information on file. View our Donations section to learn more.
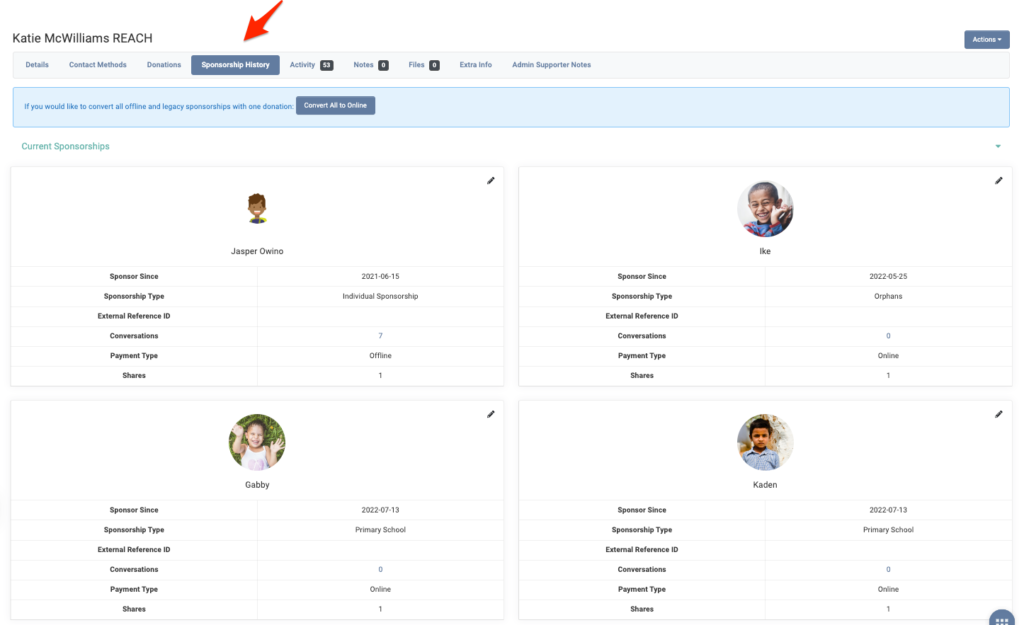
The Sponsorship History tab lists:
- Current Sponsorships
- Soft Sponsorships
- Previous Sponsorships
The Sponsorship History tab is a great way to review and update Sponsorships set up for the Supporter. Click the pencil icon next to the Sponsorship to View Details, go to Conversations, Edit or Cancel the Supporter/Sponsorship Relationship.
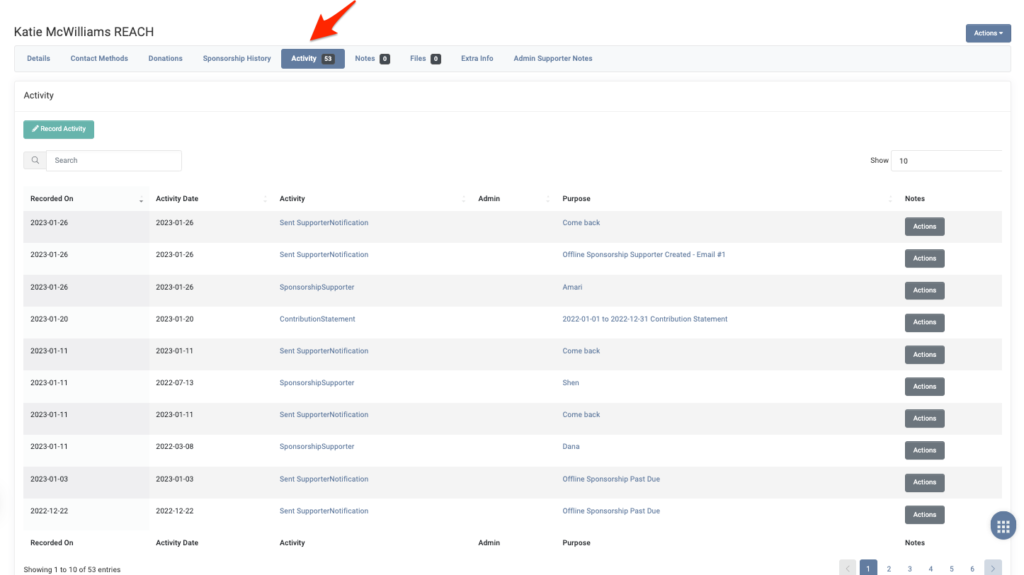
The Activity tab lists system-recorded activities regarding sponsorships, communication, and record changes. You can also Record an Activity such as a Phone Call using the Record Activity Button. This is a great way to log all communications with a Supporter.
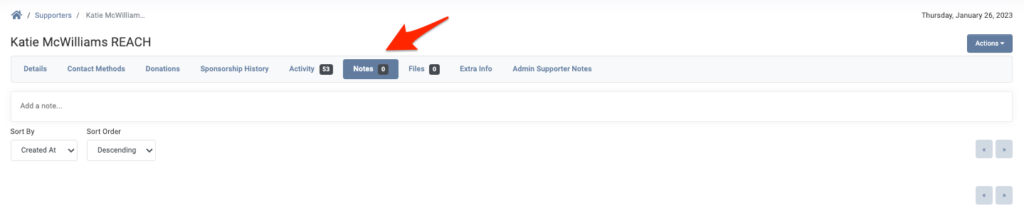
The Notes tab allows you to add notes regarding the supporter and include a due date and any associated attachments.
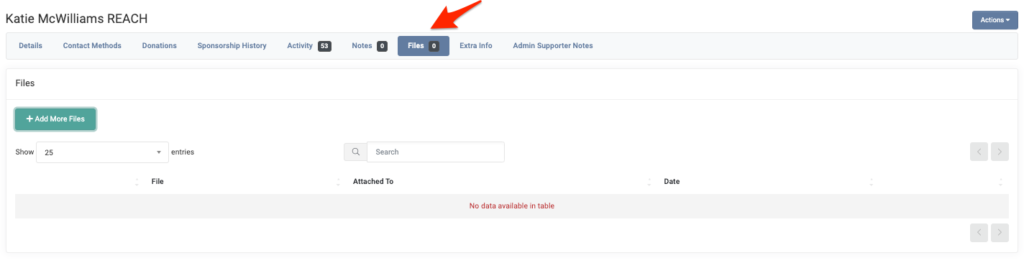
The Files tab allows you to upload and store any files related to your supporter.
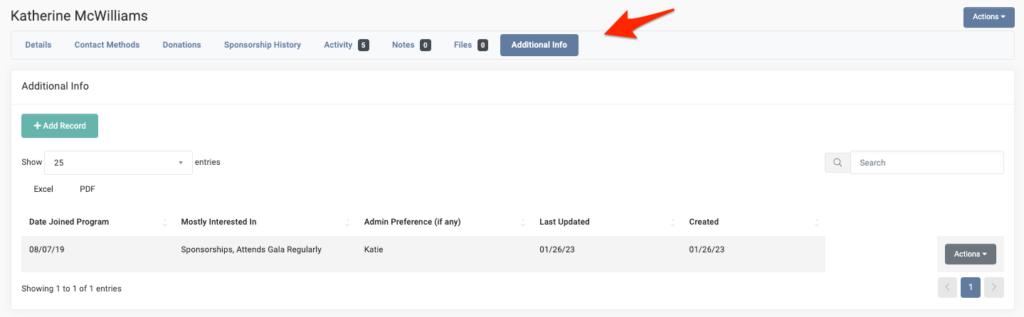
The Additional Info tab shown here is not standard with your REACH account. This have been set up by creating a Custom Field with Supporter as the Referral. This can be done by going to Data Setup > Custom Fields. With REACH, you can create any number of custom fields, setting the referral to Supporter will add this field to your supporter profiles. You can choose to show any custom fields only in the Admin Console.
In this instance, we set up Additional Info as a Custom Field and included Date Joined Program, Mostly Interested In and Admin Preference (if any) as the Fields for Table.
REACH Tip: If you choose Type of Data > Table when creating a Custom Field, you can export this data by going to Data Setup > Data Import/Export. Any Custom Fields created will be listed here and if you click on them, you can view the data and export as desired.

Also available on the Supporter Record is the ability to generate a Contribution Statement for the supporter. Click on the Actions button > Contribution Statement. From here, choose your Date Range and Template to download and Save the statement.
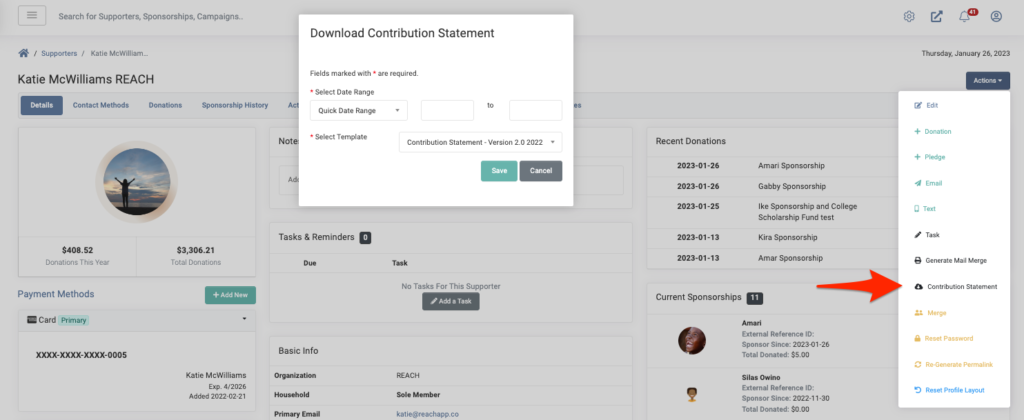
See more in our Contribution Statement article.
Customizing Supporter Profile View
Admins can customize how the supporter’s information is displayed. For example, you can make the Basic Info section display first, then Tasks and Reminders and then Notes. Or, you can display the Current Sponsorships section above Recent Donations and Campaigns.
To do so, simply go into a supporter’s record and drag and drop the various elements in the Details tab to create your preferred layout. A change in one supporter’s profile will also be reflected in all of your supporter’s profiles. To revert back, click on Actions > Reset Profile Layout.
Adding Supporter Records
You can individually add supporters into REACH or import multiple supporters at once.
REACH Tip: Before adding supporters, we suggest you first set up your supporter Custom Fields. This will allow you to have all fields available to add your supporter info into prior to completing your import.
If you already have a list of supporters from another platform, you can import all supporters into REACH at once from the Data Import/Export Module. See the Supporter Import article for instructions on this process.
To add an individual record:
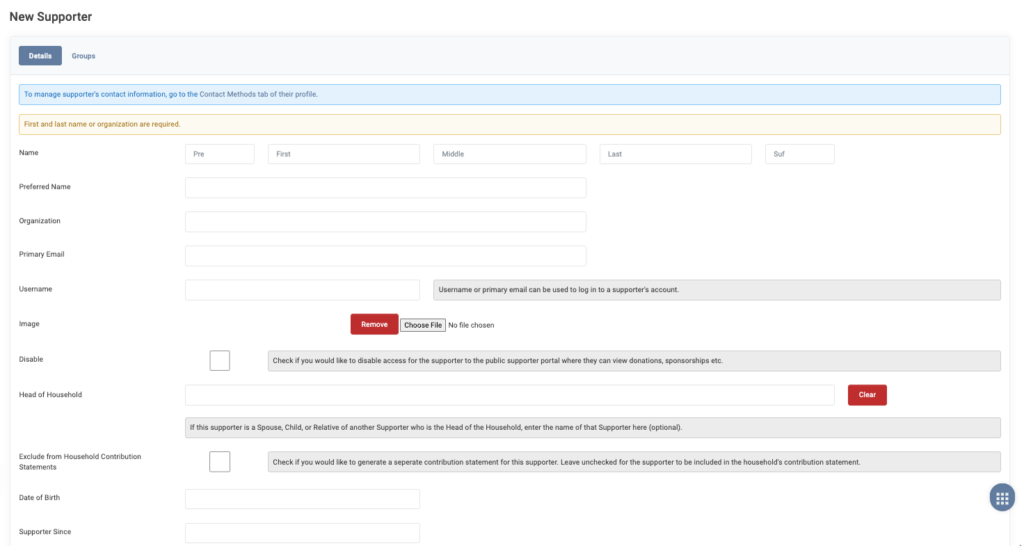
- Go to Supporters > +New Supporter
- Enter First and Last Name and/or Organization name
- Preferred Name is not required, but can be used as desired, and is included in full report downloads in Reports
- Enter a Primary Email address
- Note: A Primary Email is required in a supporter record, as this is how the system identifies the supporter. If no email address is provided, the system will automatically generate a filler email looking something like this: user_092d348d561@reachapp.co
- Username can be entered, but the system will automatically use the Primary Email for the Username. This can be updated by an admin or the supporter at any time.
- Check Disable only if you would like to disable their access to the donor portal from your site
- Add a Head of Household to tie this supporter to another Supporter. Check Exclude from Household Contribution Statements if desired.
- Include additional information as desired, this includes information added as your Custom Fields.
- In the Groups tab, add the supporter to any applicable Groups that have been created
- Click Save Changes
To add contact information:
- Once the record has been created, click the Contact Methods tab to add contact information
- Click each button to add Phone Number, Email, and Address
- When creating a phone, email or address record, a Type must be selected
- One Primary must also be selected for each contact method
- The Primary Email will already be included if added in setup, and is updated from the main Edit screen
Actions from a Supporter Record

When in the Supporter record, use the Actions button to:
- Edit the Supporter
- Add a Donation or Pledge
- Send an email
- Send a Text Message
- Create an Admin Task
- Generate a Mail Merge
- Print out a Contribution Statement
- Merge with another supporter’s record
- Reset the supporter’s password
- Re-generate the supporter permalink
- Reset profile page arrangement to default
Let’s Get Social