Your Account Rules settings allows you to manage General automated actions and settings related to your supporters and your Sponsorships, Campaigns, Recurring Donations and Security.
To review and manage your Account Rules:
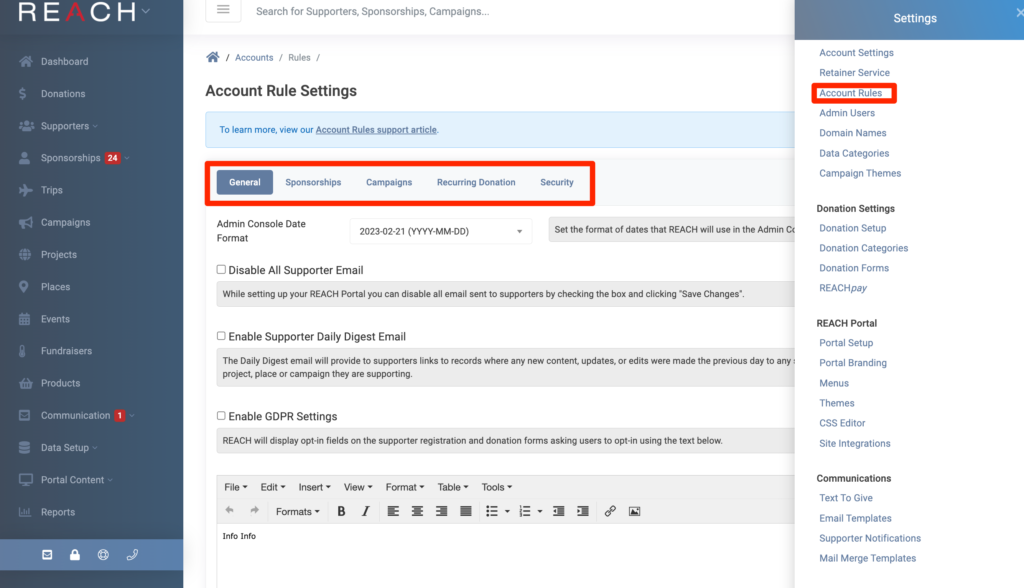
- Go to Settings > Account Rules
- Review your options under all tabs to establish and set your Rules
- As always, be sure to click Save Changes after each setting update
Some notes about each tab:
General Account Rules
- Admin Console Date Format – Admin Console Date Format will change date display in the Admin Area, but not on any date entry field which uses a calendar pick option.
- We recommend disabling all supporter emails while you set up your REACH account.
- Note: Remember to uncheck this box once your set up is complete to enable all supporter emails to begin.
- Enable Supporter Daily Digest Email – when checked, supporters will receive daily updates on ALL updates to Projects, Places and Campaigns.
- The General Data Protection Regulation (GDPR) is a European Union (EU) regulation that governs consumers’ private information. Using REACH, you have the option to allow REACH to display opt-in fields on the supporter registration and donation forms asking your supporters to opt-in to meet the GDPR requirements.
- Note: For organizations that have GDPR enabled, if your supporters have not opted-in to receive communications (via the GDPR opt-in fields on your supporter registration or Donation Forms, for example) they will not receive communication from REACH.
Sponsorships Account Rules
- Notify admin of past due sponsorships – Select an admin from the dropdown menu to notify when sponsorships become past due.
- Automatically add new sponsors to a group – Select which Group from the dropdown menu to automatically add new sponsors in to. Groups can be set up by going to Supporters > Groups.
- Order sponsorships by – Choose to order your public sponsorships by Position, Alphabetically or Randomly
- If ordering Sponsorships by Position, the Positions for sponsorships can be set within each Sponsorship record. Position allows you to move sponsorships up in the list displayed to the public. The higher the number means the better the rank in the list. For example a record with the position of 1000 is displayed before a record with the position of 0 or 100.
- Bypass the cart page on new sponsorships – If you check the box to bypass the cart page, supporters who are donating to multiple items (i.e. choosing more than one sponsorship) will not see a list of their selections prior to completing their information on the donation page.
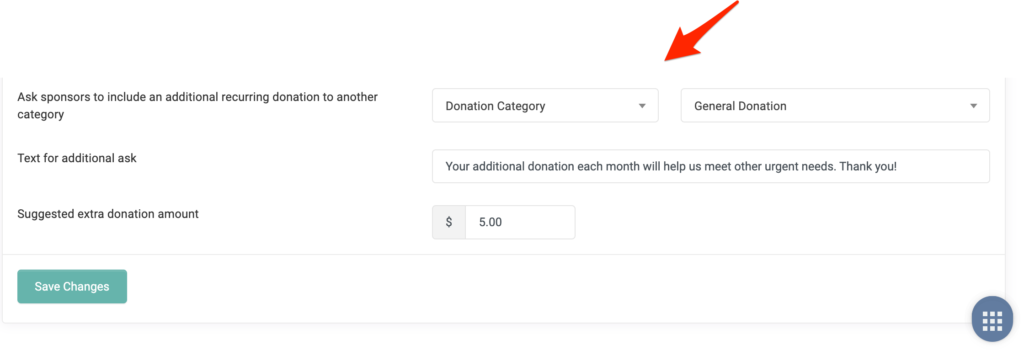
- Asking sponsors to include an additional recurring donation will add a recurring donation to the sponsorship. You can choose any Project, Place or Donation Category you have set up, include the text you wish to display and a suggested amount.
- Note: If you do not want to provide a suggested amount, simply set the amount to $0.
- Common Example: Request that sponsors add $5 as a General Donation to their recurring sponsorship donation. Here’s how this would look:
Campaigns Account Rules
- Require new supporter campaigns to be reviewed before shown publicly – If checked, an admin will have to review and approve a supporter campaign before the campaign is publicly visible.
- Send supporters an email when their campaign receives a donation – For supporter created campaigns, the supporter will receive an email if their campaign receives a donation if the box is checked.
- Note: Visit our Approving Supporter Campaigns article to learn more about your Campaigns options
Recurring Donations Account Rules
- Disable email sent after recurring donation is processed successfully – If unchecked, supporters with recurring donations will receive an email after each successful donation; if checked, all supporters with recurring donations will receive an email after each successful donation. This rule applies to all supporters.
- Notify donor of failed recurring donation after – x Failures
- The number set here determines how many times (days) the system will attempt to process the donation again if it fails.
- After the number of failed donations set here, the supporter will get an Error Email which your organization is blind copied on – the donation will not try to process again until the supporter or an admin updates the payment information.
- Assign Admin task to follow up on a failed recurring donation after – X Failures
- The number set here determines when the admin will receive a notification of the failure.
- Note: This number should be the same or lower than for the donor. For example, you cannot have 1 Failure for donors, and 3 Failures for the admin.
- Automatically cancel the failed recurring donation after – X Failures
- The number set here determines when the failed recurring donation will be cancelled.
- Refer to our Resolving Donation Errors article for more about Failed Recurring Donations.
- Note that this will also cancel the associated sponsorship(s).
- Try supporter’s primary payment method on recurring donation payment method failure. – When checked, if a recurring donation fails, REACH will automatically attempt to use the supporter’s primary payment method on file (since February 2022).
- Notes:
- If the supporter updates their payment method while there is a failed recurring donation, REACH will also retry the donation.
- A supporter’s record will need to have a payment method marked Primary. To learn more, see our Updating Payment Information article.
Security Account Rules
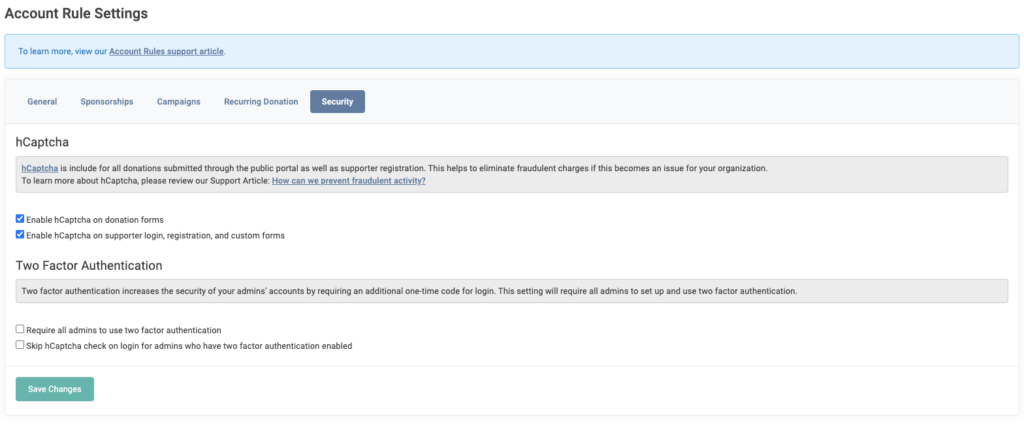
hCaptcha can be enabled for all organizations to provide further fraud protection.
You can choose to Enable hCaptcha on your:
- Donation Forms and/or your
- Supporter Login, Registration and Custom Forms
Two Factor Authentication – Two-factor Authentication, or 2FA, is an extra layer of protection used to ensure the security of REACH admin accounts beyond just the username and password.
2FA is strongly recommended for all REACH admin accounts, but is not currently required by REACH. However, you as an organization, can choose to Require all admins within your organization to use two factor authentication by checking the box.
You can also choose to:
- Skip the hCaptcha check on login for admins who have two factor authentication enabled
As always, be sure to click on Save Changes once complete.
Let’s Get Social