REACH provides a way for nonprofits to import their sponsorship records through our Data Import tool.
The Data Import tool will allow an organization to import sponsorships, supporters and donation history. This is particularly helpful for organizations that have been tracking sponsorships from another system.
Important Note:
When first importing information into REACH, the order of your imports should be:
- Sponsorships
- Supporters
- Donation History
The imports will build on each other, so this is essential.
You will use the permalinks created by the Sponsorship Import to connect Supporters with existing Sponsorships. You will use the permalinks created by the Supporter Import to link Donation History to a Supporter.
Before Importing Sponsorships
You will need to fully set up your program in REACH prior to import, including your sponsorship custom fields and sponsorship types and shares, as these will be necessary for your import template.
If you have photos or images you would like to attach to your sponsorships for their primary image, you should upload those primary sponsorship images first, and then include the file names in the sponsorship import as directed in the Sponsorship Import Template.
Upload Primary Sponsorship Images
- Go to Sponsorships > Sponsorship Images.
- (Refer to our Sponsorship Images article for tips on preparing your images)
- Click +Add More Files
- Note: If you have already imported your sponsorships: Click Match by File Name (this option is not generally used in the initial setup phase, but is used if you have already imported sponsorships and are matching new sponsorship images to sponsorships that you have already imported)
- Note: If the file name of the image is the permalink or external reference ID of the sponsorship, REACH will attempt to match the photo to the sponsorship when importing.
- Note: If you have already imported your sponsorships: Click Match by File Name (this option is not generally used in the initial setup phase, but is used if you have already imported sponsorships and are matching new sponsorship images to sponsorships that you have already imported)
- Drop your files into the box or click to upload
- You will be notified when the upload completes or fails for each image
Your images are now ready to be matched to your Sponsorships Import Template.
Prepare your Data for Import
- We recommend completing a test import with just a few sponsorship records. With the test import completed, you can see firsthand where each data field maps to and fix any errors accordingly before importing all of your records.
- We suggest you limit each file to 2,000 records or under. If you have over 2,000 records, simply build additional spreadsheets in increments of 2,000 records.
- The imported file needs to be in standard Comma Separated Values .csv file format (not CSV UTF-8). If you are using Excel on a Mac, the format to choose when saving is listed under the specialty formats, not the common formats.
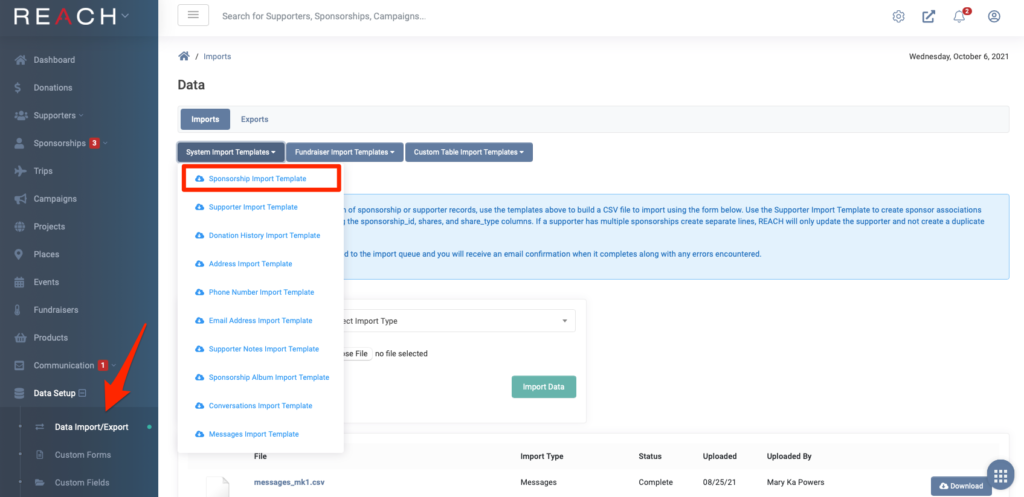
- Go to Data Setup > Data Import/Export
- Click the Sponsorship Import Template to download the template. *Note: Depending upon the version of Excel you have, you may receive a potentially corrupt notification for the .XML import template. The file is not corrupt and is ok to download and open.
- The file downloaded will have two sheets included, the first one lists the column names and a description of what sponsorship data is needed in each column. The second sheet is where you can enter your data for the import.
- Enter your data in the second sheet.
- There are two required fields: the title (name of the sponsorship) and the sponsorship_type_id (correlates with the sponsorship types you have set up). The title field will be used by the system to create a unique permalink for your sponsorships.
To match your sponsorships to their image:
- In the Sponsorship Import Template, insert the image file names in the “image” column
- Make sure to include the filename extension
- The complete file name is case sensitive and must match
- This image will be used as the sponsorship’s profile image.
- You can include more images in the columns for image_2, image_3, and image_4. A total of four images are allowed in the import for each sponsorship. These images will be included in the sponsorship’s album (which you can update your REACH Theme to display on the Sponsorship Page of the website).
- You can add images via a URL link. To do this, add a column in the template titled image_url and then add the url for your image in that field.
- To update your sponsorship profile images, or add images to their albums, see our Sponsorship Album article.
- See our Sponsorship Classifications article to review the various classifications available for your sponsorships.
- Delete any empty rows from your spreadsheet. This will save time during the import process. Empty columns should not cause a problem.
Import your Data
- Once your file is ready, save as .CSV (Comma Separated Values)
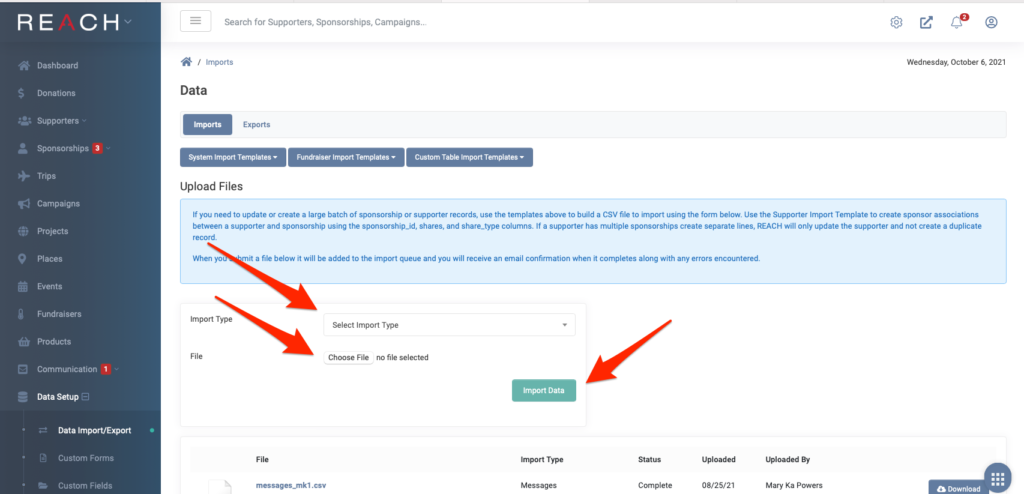
- Go to Data Setup > Data Import/Export
- Under Import Type, select Sponsorships
- Choose File
- Click on the green Import Data button
The import job will be added to the queue and should not take long to complete unless you have several other jobs also running in the background. Any errors from your import will be flagged with a red caution button. Click the button to review your errors.
Common errors include:
- Spelling
- Capitalization
- Allowable field words
To resolve, correct any errors in your import template data sheet, then repeat the import steps.
Refer to our Sponsorships section for more information on Sponsorships.
Let’s Get Social